How to do Water Calculations Without Paying for a Test
When I started home brewing, I didn’t bother dealing with my water. If it was drinkable, I was told, then it is good to brew with. Many home brewers probably started out the same way. However, water chemistry – if done right – can take your beer’s quality to new heights.
The key to getting the right water chemistry is knowing what you’re starting with. There are tests out there that will tell you exactly what your water consists of. However, since I’m both equal parts cheap and lazy – I didn’t want to bother with it. Research was my friend here, and there are a lot of ways to estimate your water’s starting point without an official test.
Water Basics
It is important to understand some basics of water chemistry first.
There is a big difference between soft and hard water. There’s also a huge difference between municipal and well water too. Some people go out and buy reverse-osmosis or distilled water, but is that really needed?
In relation to home brewing, there are a few important chemical compounds to be cognizant of. While a water test will provide you more values than these six, these are the most important ones. They will be shown in either ppm or mg/L amounts, and are different for every water source. Each type of beer will have different target values for these compounds, so it is important to know your water’s starting amounts.
- Sodium (Na)
- Calcium (Ca)
- Magnesium (Mg)
- Chloride (Cl)
- Sulfate (SO4)
- Bicarbonate (HCO3)
Unfortunately, the water additions available to home brewers are not 1:1 with these compounts. For example, Gypsum is a common additive used, but it is made up of calcium and sulfates (Ca+2 SO4). Because of this complexity, it is best to use a calculator to determine how much of each addition is needed. I won’t get into these calculations because there are places that are infinitely more qualified than myself to do it. Bru’n Water and Brewers Friend Water Calculator are two of the more popular calculators in existence.
The Water Test
I worked to avoid getting this test done, but it’s important to know about it. Ward Labs has the W-501 Brewers Test that provides your water’s Bicarbonate, Calcium, Carbonate, Chloride, Iron, Magnesium, Nitrate, Phosphorus, Potassium, Sodium, Sulfate, Total Hardness (Lime), Total Alkalinity, Electrical Conductivity, pH levels.
To take the water sample, run your tap for about 5 minutes to clear the water from your pipes and fill an empty and cleaned bottle. 8-16 oz of water in a plastic container is what they need, so a 375ml bottle that used to hold cheap vodka works perfectly. Close the lid and tape it up. Fill out the submittal form. Use bubble wrap around the water bottle, then place it and the form in a box (USPS flat rate works great for this). Tape the box closed, address to Ward’s lab, then ship it.
At the time of this writing, this test cost $27.25, and requires you to gather, package and mail your own water sample to them for analysis. However, you can also order their full kit for $42, which provides you a bottle and form.
Regardless the way you get it, the end result of this test will look like this.
Ways to Find Your Water Test for Free
I didn’t want to spend the money on a Ward test, especially when I was still new to home brewing. I was already buying new fermenters, corny kegs, and other “essential” equipment, so I wanted to find a way to work on my water calculations without paying for the test.
Option #1: Find a Neighbor’s Test

This was my preferred method, and there are a few ways you can find the data you need. My favorite is Brewer’s Friend Water Profiles page.
This page is huge and has almost 6,000 user-submitted water profiles from all over the world. Once this page loads, hit Ctrl-F on your keyboard to bring up the search function of the browser.
Search every area or street you can think of, starting with the closest to your home’s location. Work in order from most specific to least: Street, City, Township, Borough, County, and so on. I was able to find a water profile that was only 5 miles away from my home in a neighboring town.
It is important to find not only a report that is close to you, but one that is using a similar water source. If you have well water, you can’t use a report from a municipal water source, or vice versa.
I have well water, but was able to use this spring report since the two are exactly the same except for how they make it to the surface. While there is no guarantee that this is exactly what my home’s water is, it is a good enough jumping off point. The goal with home brewing is to get close with the water’s makeup, then use trial and error to get the best results.
Option #2: Use Your City’s Report
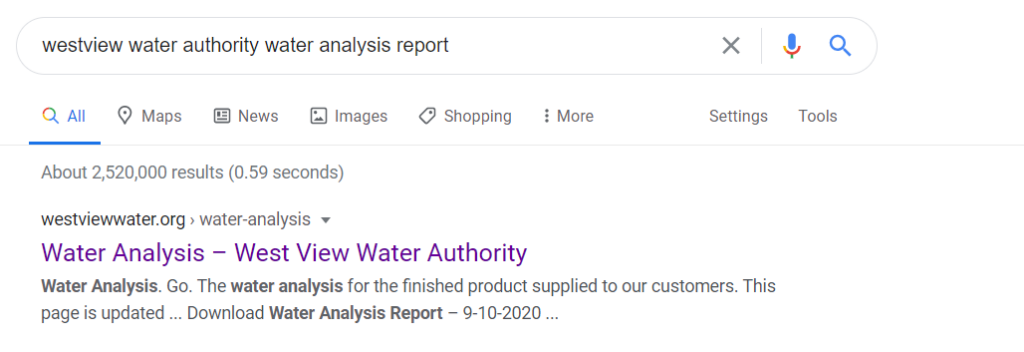
This option only works if you have city water. It will also take some Googling skills to find the right data for your specific city’s water authority. Once you find the right company and their data, look for the “Secondary Standards” or “Aesthetic Standards” section of their water report. This will provide you the values you need for home brewing.
For example, I searched for a local water authority’s report, and found exactly what you’d need. Hopefully you have the same luck with your local supplier.
Option #3: Use Cheap At-Home Test Strips
Obviously this option is not free, but it is cheaper. These test strips are cheap and usually come in packs of 100 or more. This means that for less than the price of one Ward test, you now have a hundred.
The downside to these strips is that they don’t provide the full picture. These strips give you color-coded squares that provide estimated ranges for each parameter. There are a handful of parameters given, but only total hardness, total alkalinity, pH and carbonate are needed for this exercise.
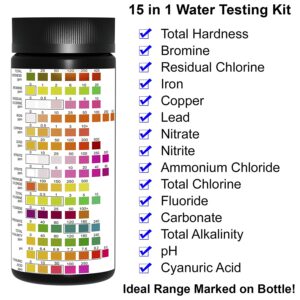
As a brewer, you’d love to see Total Alkalinity less than 50 ppm (unlikely) and definitely less than 100 ppm. It is common to see Total Alkalinity numbers between 50 and 150.
As for Total Hardness, you generally want to see a value of 150 ppm or greater as calcium carbonate. Preferably, you’d like to see a value greater than 300, however that is unlikely. Typically, you will see total hardness numbers in the range of 75 to 150 ppm if you have city/municipal tap water.
Option #4: Use Reverse Osmosis Water
By using reverse osmosis (RO) water, you effectively rid the water of all chemicals and are left with a blank slate. This allows you to start with all zeros in your calculators, making the salt additions nearly foolproof.
A lot of Walmarts and grocery stores offer RO water filling stations very cheaply. The average cost of RO water is $0.35 per gallon, making a 5 gallon batch (8 gallons total) around $3.
Primo is a popular company that provides RO water, and they have a search tool to find local refilling stations.
