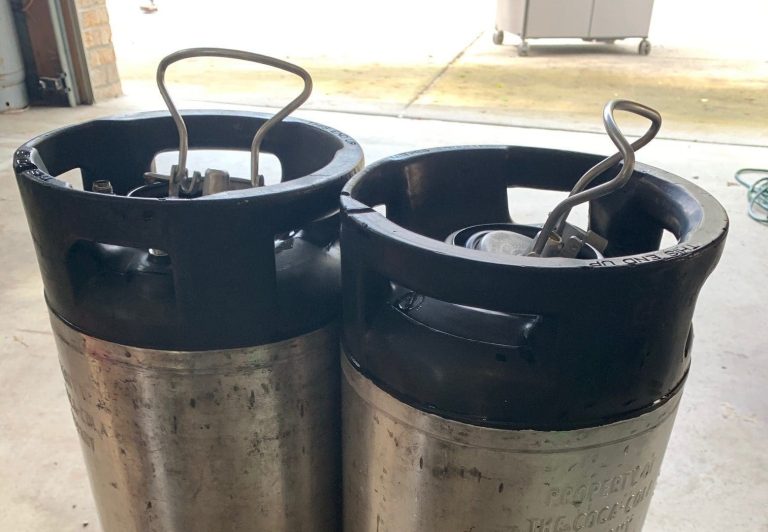
Building a Closed Pressure Transfer Kit for my Delta FermTank
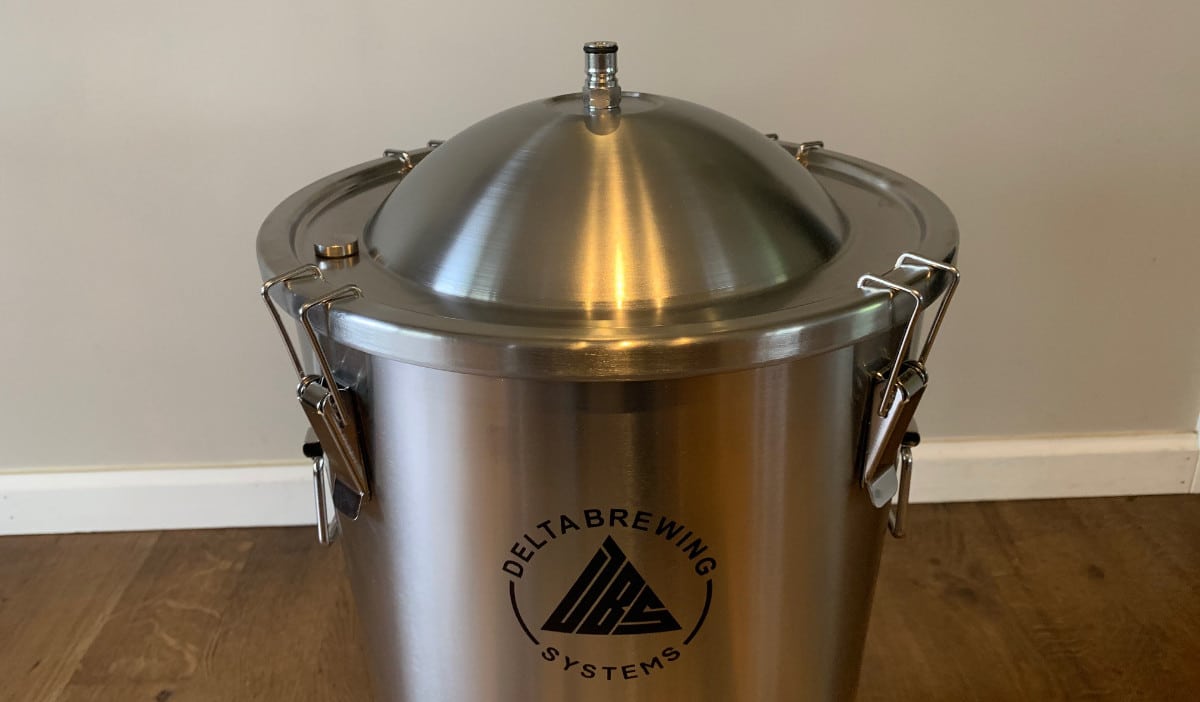
Delta makes a great product. I recently chose their stainless steel 8 gallon FermTank over similar products from Anvil, Spike and SS Brewtech. I am beyond happy with my decision, but a home brewer never stops tinkering.
You can read my full review on the Delta FermTank here.

Delta offers a Closed Pressure Transfer Kit on their site for $50. They were out of stock when I bought my FermTank, but even if it had been in stock… I probably would have skipped it to build one myself. What I quickly found was that I could have pieced one together using some spare parts I already had on hand, but I instead decided to step up the ante a bit.
My closed transfer kit comes complete with two sections: One that connects the CO2 canister to my fermenter, and a second that connects my fermenter to a Corny keg.
All told, I spent less than $40, build a better product, and came out of it with a system that will transfer my New England IPAs in a no-oxygen environment. Having a closed transfer is essential if you want to reduce oxidation of your beer, which is doubly important if you make a lot of NEIPAs like I do.
Building the Kit
If you are attempting to perform a closed transfer, you should already have a keg system setup, if not – please do that first. The rest of this article is worthless if you aren’t already kegging.
Also, this kit should work on any stainless fermenter, and not just my preferred Delta FermTank. If your fermenter’s lid doesn’t have a pre-drilled hole in it to accept the gas post manifold, then you can use this step bit to drill a 1/2″ hole. Remember to remove any burrs after drilling.
1. The connection between your CO2 tank & Fermenter
Note: I already had some of these items, since I previously built my force carbonation station. So in reality, I just purchased the Ball Lock Post Manifold for my scenario.
- 3/8″ ID Silicone Tubing (about 5 feet)
- Gas Ball Lock Post Manifold
- Gas Disconnect with Check Valve
- (2) 7/16″ ID neoprene washers
- Tube clamps
Now, the lid of this fermenter will need to account for two different situations. First, there needs to be an airlock to allow the CO2 created during fermentation to escape. Second, there needs to be a way to pressurize the unit for transfer.
In all cases, we will be installing the gas post to the middle hole (green circle) in the lid. The gas post is about 1/32″ too big for the hole on the lid, so I used my Dremmel tool and sanded the diameter of the hole for a few seconds, and it fit like a glove. This small of a change will not impact the use of any other usage of that hole. Hand tighten the nut under the lid. Be careful not to overtighten as it will cause the rubber gasket to warp and break the seal.
How the second hole (blue circle) on the side is used, we have a couple different options:
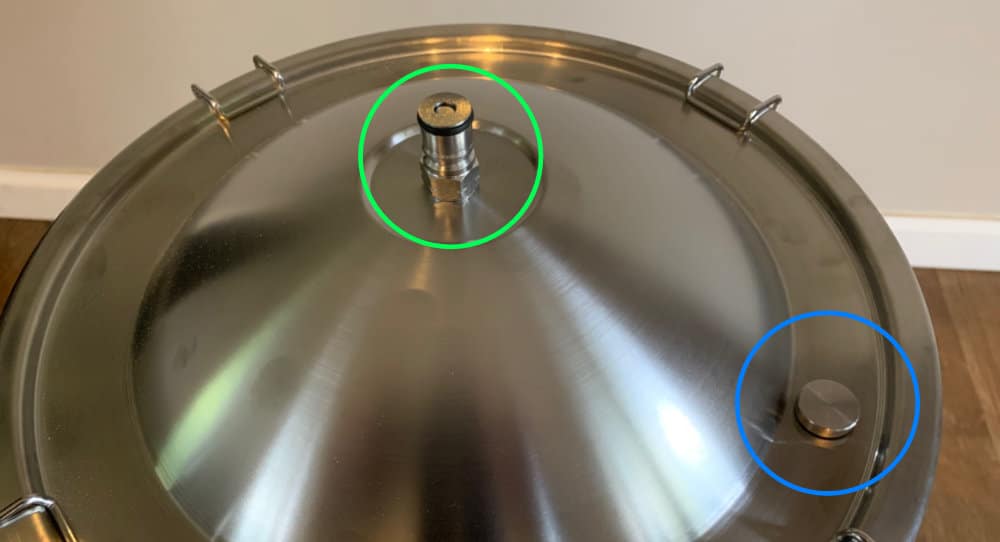
- Connect a length of 3/8″ hose to the barb manifold provided by Delta, and dip it into a container of sanitizer. However, this becomes a problem during transferring since it becomes an unsealable oxygen entry point.
- Install the rubber grommet and plastic airlock provided by Delta. I don’t like this option because as you increase pressure inside the tank during transfer, that airlock may push out.
- Preferred (as shown in picture): Close off the second hole (blue circle) with the plug manifold that came with your FermTank, and only install the new Gas Post in the middle lid hole (green circle) with a neoprene black washer on the top and bottom of the gas post. In this scenario, we are going to use the gas post for both the blow-off and the gas pressure.
After the lid is assembled, your next step is to build the gas line that can double as the blow-off tube if you so choose. Attach the gas disconnect to one end of the 3/8″ tubing with a hose clamp. During fermentation, the open end of the tubing can be placed into a jar of sanitizer. When it comes time to pressure transfer, connect that open end of the tube to your CO2 tank.
I, however, was able to use a few of the devices I built in place of the tubing above. During fermentation, I connected my DIY spunding valve to the gas post, then swapped it out for my carbonation station when it came time to transfer.
2. The connection between the Corny Keg & Fermenter
- 3/8″ ID Silicone Tubing (about 5 feet)
- Liquid Disconnect
- Tube clamps (the ones you can hand-tighten will work best here)
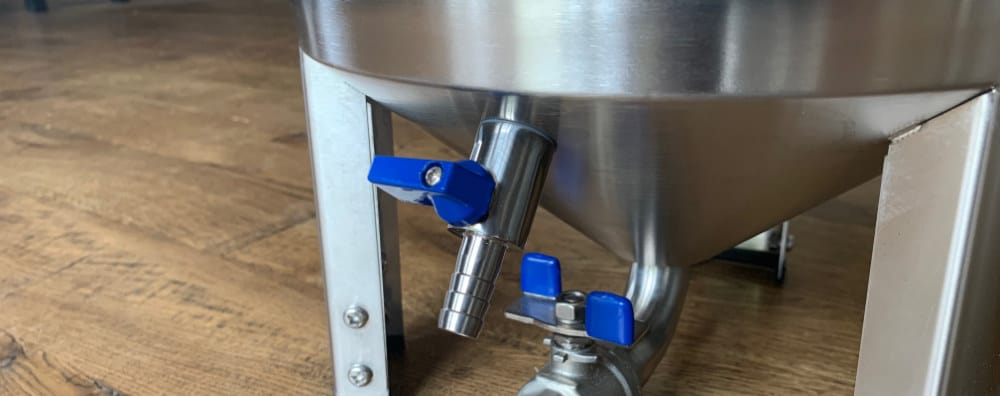
The ball valve that Delta comes with has a 3/8″ barb on the end. Connect one end of the tubing to the liquid disconnect and the other can be squeezed onto the ball valve barb and secured with a clamp.
Performing the Closed Transfer
Performing the closed transfer to a keg from your fermenter is a mix of synchronized actions and being slow and mindful. Take it slow, and use as little pressure as possible. I cannot stress that bolded sentance enough.
Also, even though I describe the whole connection process below, I decided to also draw a quick diagram as well. They say a picture is worth 1000 words… well in this case, its worth about 150. This diagram shows how everything should be connected right before the transfer is started.
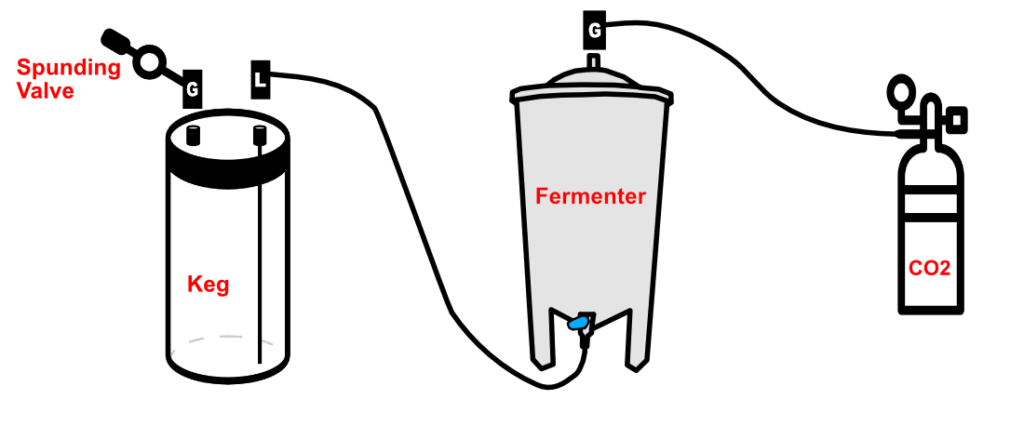
- Purge your Corny Keg with CO2.
- Connect the gas post on your lid to the CO2 source, but keep it turned off at the moment.
- Connect the corny keg and ball valve with your liquid disconnect tube.
- Attach the spunding valve or spare gas disconnect to the gas post on your keg. Set it to as close to 0-1 PSI as you can.
- Slowly open the pressure from the CO2 tank to 2-3 PSI.
- Quickly open the ball valve at the same time. Beer should begin flowing from your fermenter to your keg.
- You will be able to tell when the fermenter is empty and the keg is full because the tubes will run empty. It should take anywhere from 15-20 minutes.
- Disconnect both the gas and liquid disconnects from the keg.
- Your keg is full of your beer. My next step would be to force carbonate it, but you do what makes you happiest.
