Detailed Plans to Build Your Own Hop Trellis
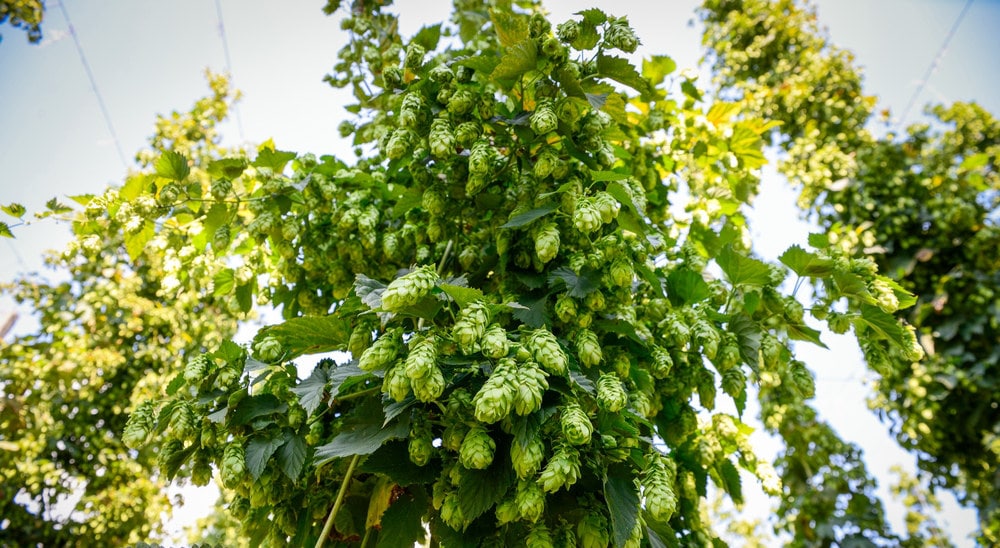
Hop plants can grow up to 20 feet high, and need a trellis to grow up. These plants cannot lay on the ground and need to grow vertically.
Hop trellises can be made as simply or as complex as you want, however, there are a few key things you should keep in mind when planning the build.
First and foremost is deciding where the plants should be placed in your yard. Plant your new hop rhiozomes facing south in an area that receives plenty of daytime sunlight. The area should also be slightly elevated and drain well. Once in the ground, there are other steps that need to be taken to ensure your hop plants have the best chance at survival, including pest management and pruning.
Once you’ve determined where the trellis will sit, then the conversation turns to figuring out the materials you’ll plan on using. The most basic trellis uses twine and wooden posts. However, others have swapped out stainless steel wire for twine and sides of houses or fences for the wooden posts.
Buy a Premade Option
You can of course go out and buy a hop trellis system as well. The IBEX Hops Growing System is a popular one that certainly has some features that a DIYer would be hard-pressed to build in. besides being stainless steel throughout, this system also wings down for easy harvesting and maintenance, so you don’t have to work 20 feet in the air.
The IBEX Hops Growing System comes with everything you need to start growing your own hops. In addition to the compact trellis, this all-in-one kit includes all required hardware, a step-by-step installation video and printed instructions. The included trellis can be used for installations of up to 30 feet in length.
At the heart of the IBEX Hops Growing System is the patent-pending, maintenance-free trellis structure. Small enough to be installed in most backyards, the trellis is designed to be versatile and scalable, while also looking good. The best selling point of this trellis lies in its ability to rotate downward without the use of tools to make caring for plants and harvesting your hops even easier.
- All In One System
- Installs Anywhere
- Compact, Rotatable, Trellis Structure
- Easy to Grow, Train and Harvest Hops
The IBEX system comes with the trellis structure and all needed hardware which includes 18 stainless steel bine wires and 36 spring clips. It also is shipped with an auger bit, level (for getting your posts straight) and marker flags.
The price tag on this IBEX system is a whopping $775 at MoreBeer.com. The plan below should be less than a fourth of that cost.
The Hop Trellis Plan
We are going to be building a hop trellis for about four plants with two different varieties. I plan on growing 2 plants each of Columbus and Comet. I make a lot of IPAs and these two fit my style very well.
Columbus
Specific aroma descriptors of the Columbus hop includes earthiness, black pepper, licorice, spice (curry) and subtle citrus. The floral and citrus notes from the Columbus hop come out in both aroma and flavor, but can be pungent. This strong flavor a…
Alpha Acids: 14-18%
Beta Acids: 4.5-6%
Cohumulone: 28-35%
Country: USA
Purpose: Dual
Total Oils: 2.5-4.5 ml/100g
Profile: earthy, black pepper, licorice, curry, spicy, citrus, floral, pungent, dank & cannabis
Comet
Comet hops have aroma descriptors that include subtle, wild American grassy and grapefruit. …
Alpha Acids: 8-12.4%
Beta Acids: 3.0-6.1%
Cohumulone: 34-45%
Country: USA
Purpose: Dual
Total Oils: 1.0-3.3 ml/100g
Profile: grassy, grapefruit & wild
You are supposed to keep different varieties separated by 6 feet to prevent cross-pollination, so my 12-foot span should be good for that. However, if I end up with a Columbus-Comet hybrid a couple of years in, so be it… worst things have happened to me in the past.
We want to use heavy-duty materials for this as well. A mature hop plant can weigh anywhere from 20-35 pounds dry, with an extra 10 pounds once wet. That means this trellis needs to hold a total of about 200 pounds throughout the growing season.
Hop Trellis Building Materials
- (2) 4″x4″x12′ pressure treated (ground contact rated) wood posts
- (1) 2″x4″x10′ pressure treated wood board
- 100-150 feet of Coir Heavy Duty Twine
- (4) galvanized 12-16″ tent stakes
- (4) galvanized 3-5″ eye hooks
- (4) galvanized 3-5″ J hooks
- (4) 30 gallon containers
- (2) 60-pound bags of Quickcrete
- (8) 3.5″ decking screws
All materials, including some from Amazon and others from Home Depot (or Lowes, etc) ended up costing about $180. I got the twine and tent stakes from Amazon because I couldn’t find anything similar at my local construction store.
All metal (hooks, screws, etc) must either be stainless steel or galvanized, otherwise they will rust outside. Rust can eat away at the twine, but can also and unwanted flavors to any hop cones it comes in contact with.
Coir heavy duty twine is what the professionals use. There are many types of rope and twine available, but most won’t be able to support the weight of a plant. I thought it would be best to use what professional farms use in their hopyards, so “Coir” it was.
Of course, you will also need 4 hop rhizomes of your choice. I wrote an article earlier detailing the best hop varieties to grow yourself.
There are a few tools you’ll also need to do this. This is what I used:
- Battery powered drill
- Post hole digger
- Level
- Shovel
- Ladder
- Saw
Hop Trellis Plan
1. Setting the Posts
As we spoke about earlier, you will need to find about 12 feet of yard facing south and that is well drained. Once you’ve picked out your spot, the first step is to set the posts.
Mark the two spots for your two posts. I put mine exactly 12 feet apart. I live in PA, and have frost season. Because of this I needed to set the 4×4 posts about 2.5 feet below the ground surface to prevent frost-heave. I set each post with a bag of mixed up Quickcrete.
This left about 9.5 feet of post out of the ground for growing height. While a bit higher would have been optimal, with lumber prices spiking lately, I wanted to keep this build economical. You could certainly use 16′ posts instead and get 12-13′ worth of growing height.
Make sure your posts are level and facing each other appropriately. You want to ensure that the face of your first post is directly facing the face of your other post. Let the concrete cure for at least 4 hours before trying to attach anything to them.
2. Creating the Horizontal Boards
First, cut your 10-foot board in half, so you end up with 2 five foot sections.
Each section will have two (2) eye-hooks and two (2) J-hooks. We will eventually string the wire from one J-hook, through the corresponding eyelet on the other side, down to a tent stake set right next to one of your rhizomes.

Above is the image showing the spacing of my hooks. The blue dots signify where I drilled my pilot holes for each hook. The hooks on my boards were installed in this order (from right-to-left):
EyeHook ---- EyeHook ---- JHook ---- JHook
If each board is built with the same order of hooks, when you turn them to face each other, there should be an eye hook right across from every J-hook.
The pilot holes should be just slightly smaller than the threads on the hooks. Make the pilot holes too small, and it will be difficult to screw in. Too big, and they won’t be as sturdy as they should. My trick to get hooks like this in is to get a screwdriver and put it through the hole and twist it like a wrench.
Tip: Make sure the J-hooks are all facing with the opening toward the top. If the hooks are facing down or to the side, our wire can slip off ruining all the hard work you put into growing your hops.
3. Attaching the Two Horizontal Boards
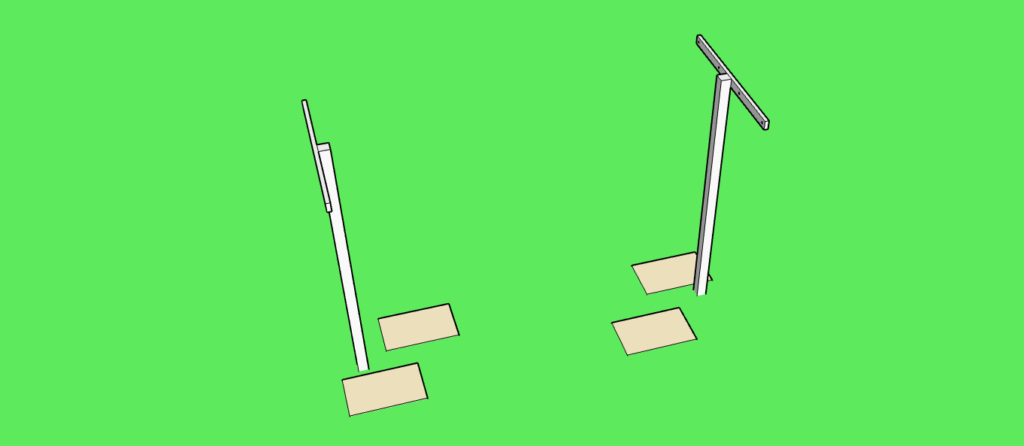
Using 4 decking screws set in a “box” pattern, attach each 5′ horizontal board to the TOP AND OUTSIDE of the posts. By attaching them outside, we prevent the heavy hop plants from pulling the boards off the posts, which could happen if they were set to the inside.
Ensure that the hooks are facing each other and that each J-hook has a corresponding eye hook directly across from it.
4. Setting the Rhizome Buckets
Hops are notorious for acting like an invasive species. If the root system is not contained properly, hops will take over whatever area they are planted in. This is why we purchased the 30-gallon totes. Drill about ten 1/4-1/2 inch holes in the bottom of each bucket for drainage, and set each one into the ground so that the top of the bucket is at ground level.
We will be spacing these buckets 3 feet apart on each side, with 6 feet in between the two sets of varieties. The 6 feet in between each variety is meant to prevent cross pollination of the plants.
Fill each bucket with a mix of dirt from your holes and good compost soil. I used a couple bags of Miracle-Go I found at Home Depot.
While I had good intentions of exactly placing these buckets, they kind of went in where ever the hole I dug was. Some were not exactly 3′ or 6′ feet away from each other, but it was close enough for me. You can be more specific in your measurements if you’d like.
5. Stringing the Twine
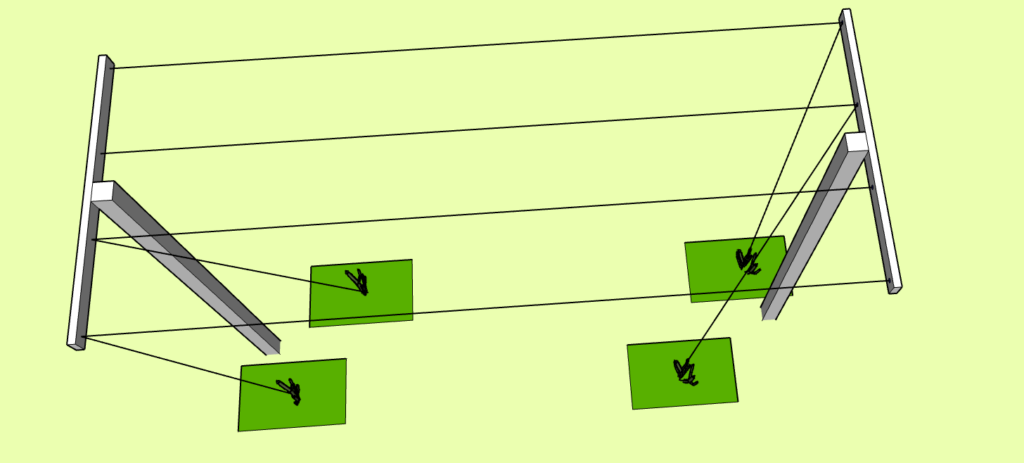
Start your length of twine by tying a loop at one end and attaching it to one J-hook. Take the free end of the twine, and stretch it across the span of posts to its opposite eye hook. Once fed through the eye hook, drop the twine down to the bucket it will be servicing. All told, each twine length will probably need to be anywhere from 20 to 30 feet long.
Inside each bucket, place one tent stake. Attach the free end of the twine to that stake. Ensure it is tied very well since we do not want it to detach in the middle of growing season.
Tip: You could choose to use medium-duty stainless or galvanized steel wire here instead of coir twine, but be forewarned: it’s really expensive. We found it on Amazon for just under $60 for a 50-foot length. If you are using wire, it is reusable, but will be a bit more of a hassle during harvest since you can’t simply cut it to bring the bines down.
6. Plant your Rhizomes
You may need to train your hop plants to reach up to their twine at first, but once they are set, they should continue to move up the trellis on their own. We wrote a whole article on how to grow your hops, so it’s best to hop on over there for more detailed growing information.
7. Harvesting your Hops
The twine we used is not reusable. For how cheap it is for 100 feet (around $15), its not even worth saving. Just cut the twine at the hooks and let it fall to the ground.
