Caring for your BIAB Nylon Bag
Brew-in-a-Bag (BIAB) bags are meant to be reused. One way to get the most mileage out of your bag is to clean it properly.
BIAB Nylon bags are very thin and feel like they are one small scratch from ripping apart. When I started brewing in a bag, I bought the cheapest one I could find off of Amazon. This bag was thin, had spare strings hanging off it from the seams and seemed like it would rip under the weight of a pound of apples let alone 10-12 pounds (5.44 kg) of wet grain. I still use it today after over 15 brews.
Buying the Right BIAB Bag
Most importantly, you need to ensure that you get the correct size of bag for what you are brewing. I purchased the Extra Large bag from the Weekend Brewer to handle my 5 gallon batches (brewed in an 8 gallon pot), and it works great.
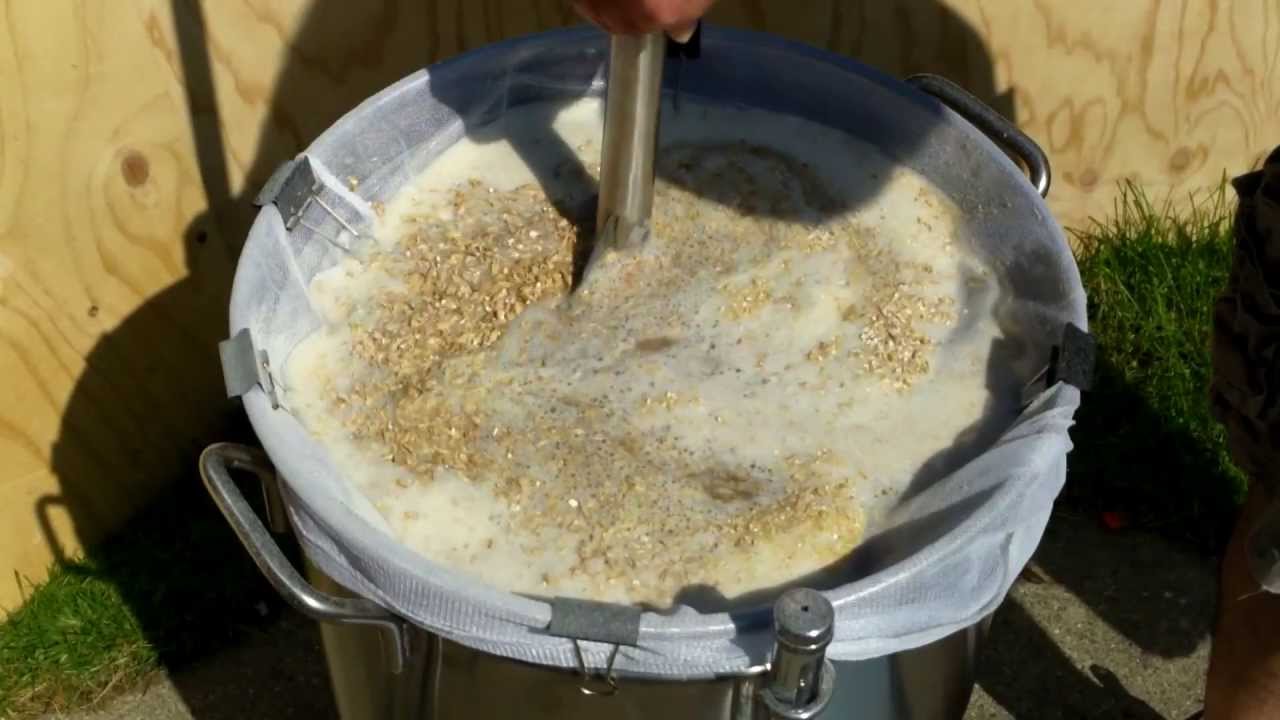
I would not have been able to get away with a smaller bag. Once you add your dry grain to the bag, you are left wondering why the bag is as big as it is. There appears to be so much room in it. Well, there is until it sits inside your brewing kettle and slowly inundates the grain with water.
The extra large bag allows you to hang the top of the grain bag over the sides of the kettle while you are stirring your mash with a spoon. This ability makes it easy to break up any grain dough balls before setting the timer for your mash length.
Long story short here – get the biggest bag you can… even if you are brewing smaller 1 or 3 gallon batches.
Caring for your BIAB Bag
A well cared for BIAB grain bag will last you quite a few brews. It is ALWAYS important to have backups, so while your one bag may last awhile with these simple cleaning steps, play it safe and have a backup on hand for the inevitable bad timed disaster.
I don’t clean my bag before mashing in… all my cleaning steps happen right after the brewing is done and the grain is out of the bag.
Wet grain molds pretty fast, so it is important to get it out of the bag by the end of your brew day. I usually just dump my spent grain in the woods, but I have also dumped some in my compost bin (it will stink) and saved some for bread making or homemade dog treats.
Once the grain is out of the bag, it will still be covered by the sweet wort. It will be sticky-ish, and there will be a lot of grain particles stuck inside the bag’s mesh. Immediately after dumping the grain I soak the bag in the warm water discharged by my immersion chiller. A few dunks and squeezes and the sticky wort is all but off the bag.
There will still be a lot of grain pieces stuck to the bag. Next step is the turn the bag inside out and holding the bag away from you, do a couple hard flicks with the bag in the air. The motion is a bit like snapping a towel. After a few “snaps” most of the grain particles will have flown out of the bag and I usually dunk it in some clean water once more. There will still be a few tiny grain pieces stuck to the bag, but don’t worry about those. I’ve left them on after all my cleanings and its never caused a problem yet.
After pulling the bag out of the clean water, I usually roll it up and try to wring (or squeeze) out as much water as I can. Really twist that bag to try and get every drop of water out of it.
After it is as dry as I can get it, I hang it on the back of a chair, and it will be 100% dry by the next day. At that point, I just throw it in the cardboard box I use to store my supplies and it waits there until my next brew.
