Building Your Own Immersion Wort Chiller
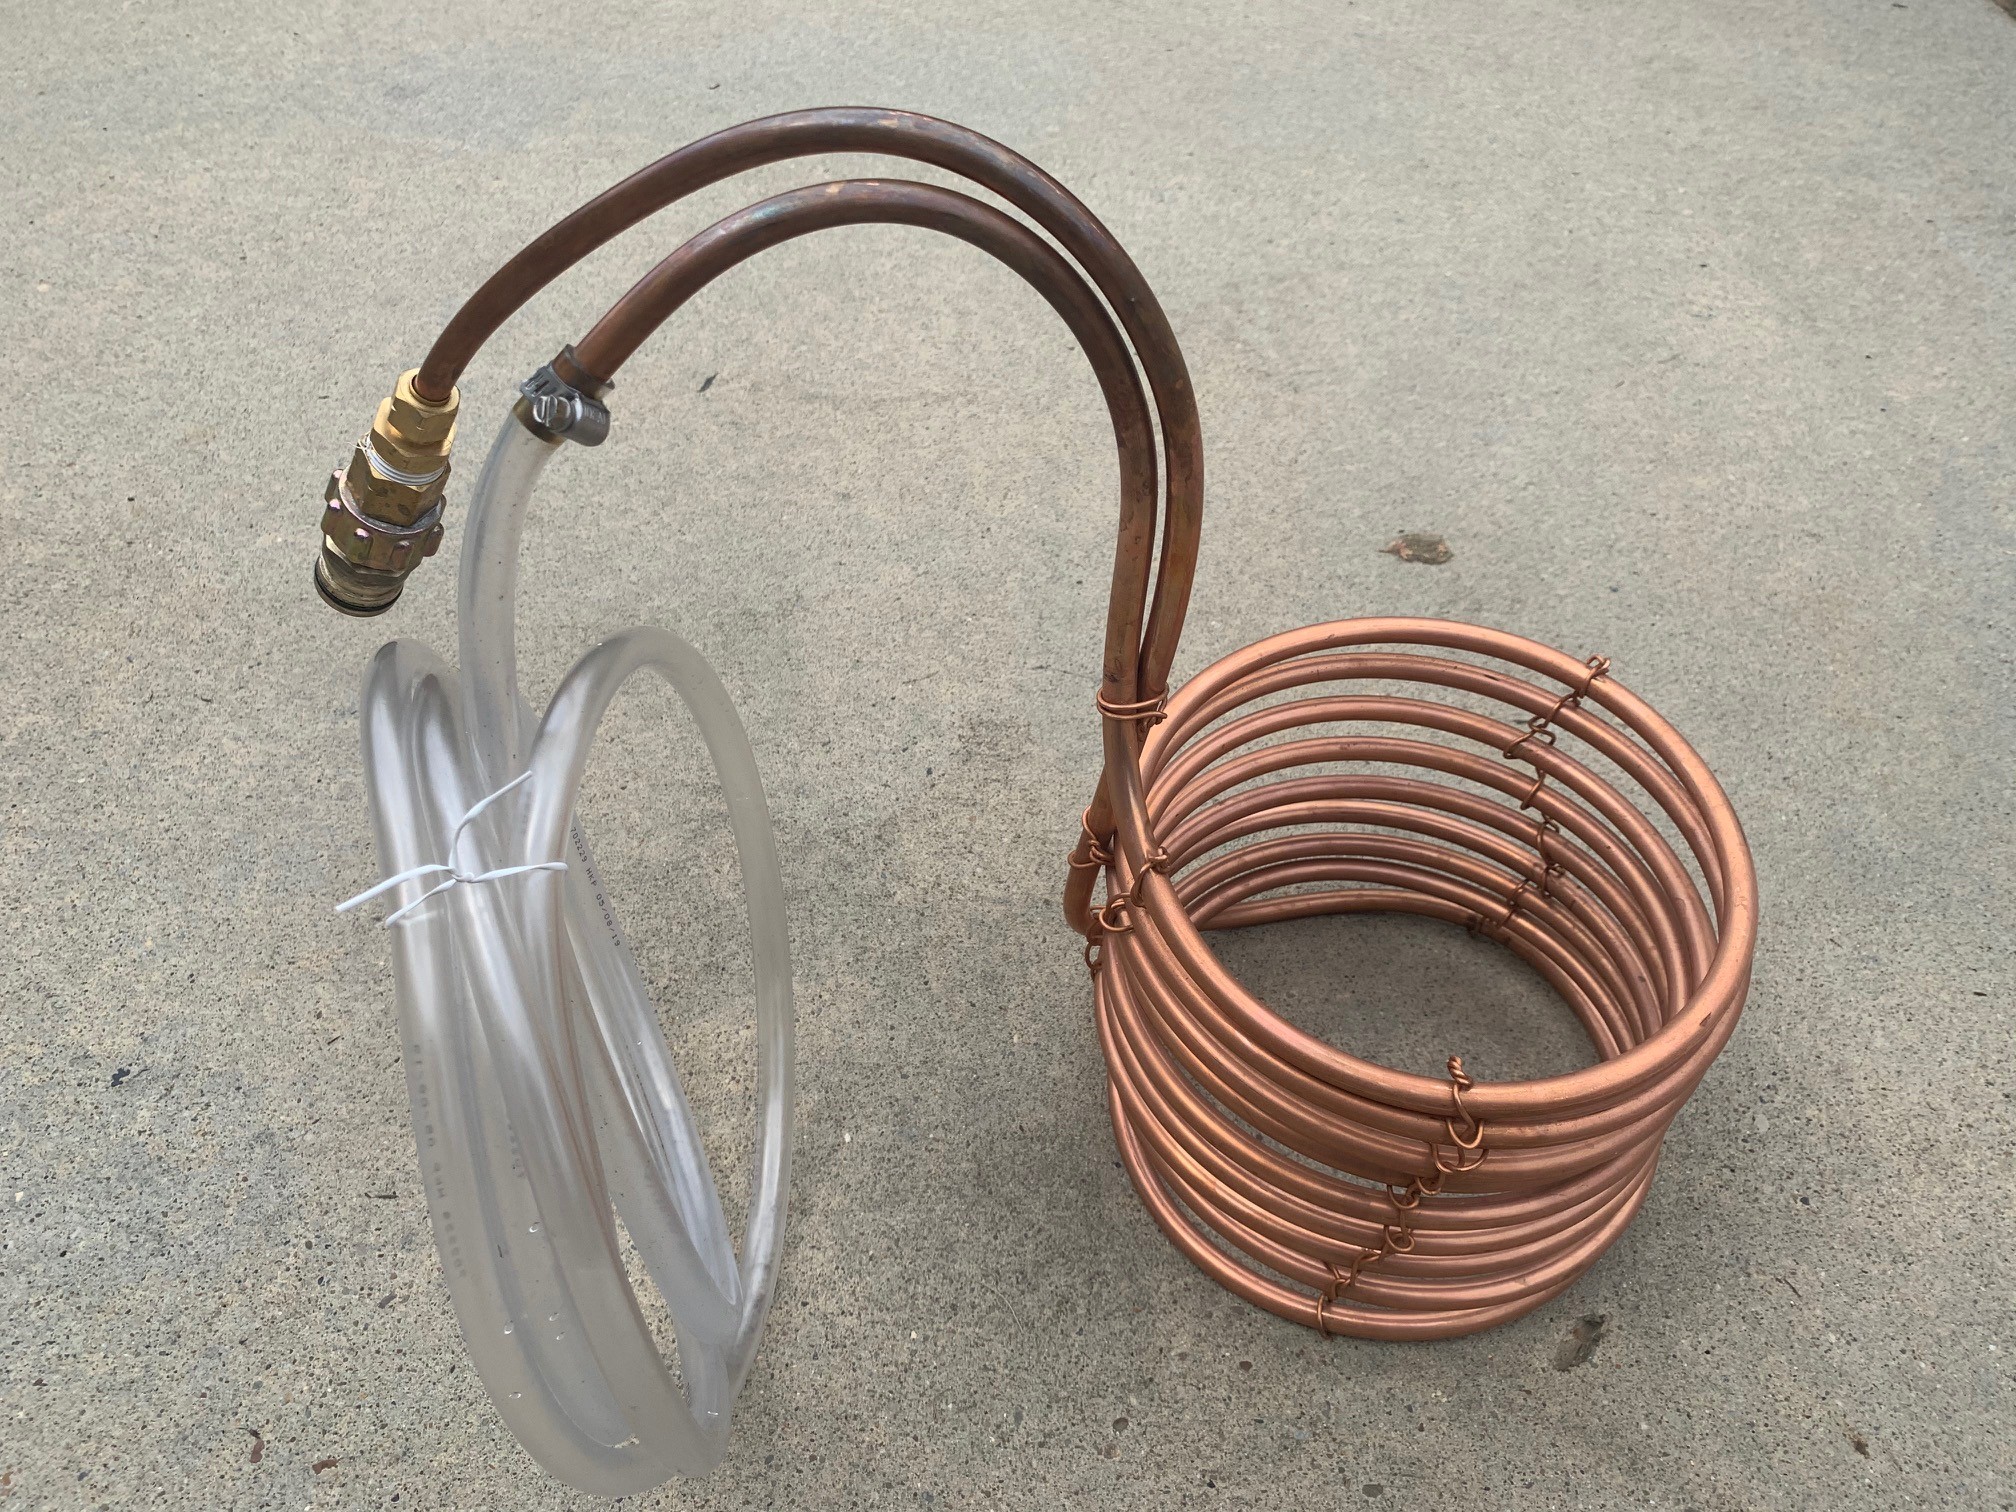
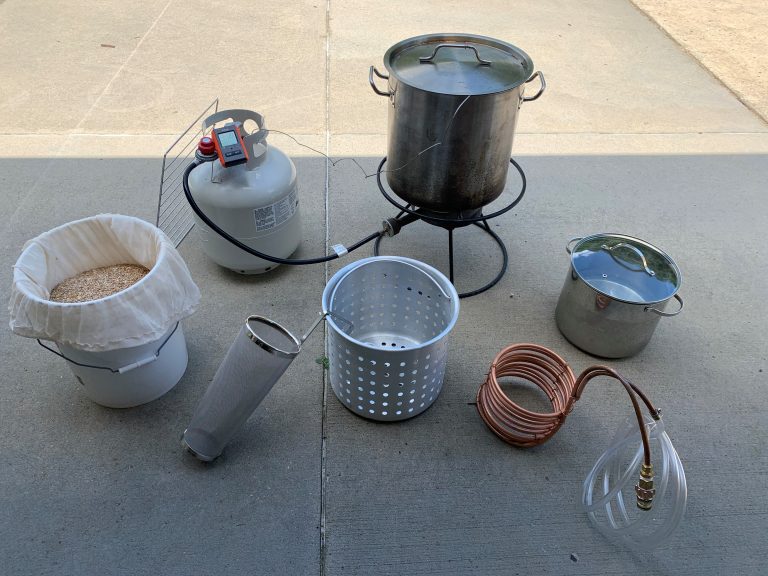
Building your own immersion wort chiller is a fun project that will take you a few hours, but will be worth it next time you try to get your boiling wort down from 212 F to 70 quickly. This wort chiller will usually get my wort down to 70 degrees within 20 minutes or so. This project cost me about $50 and only took a couple of hours from start to finish. If you are remotely handy, this should be a fun and successful project for you.
Types of Wort Chillers
It will be worthwhile to spend a few minutes laying out what type of wort chiller we are making, and what the other options are.
We are making an immersion chiller, which pipes cold water through spiraling copper tubing, extracting the heat from the boiling wort, and discarding the heated water into another bucket.
A counterflow chiller is probably the more efficient type of wort chiller available, but that is not what we are building here. Unlike immersion chillers, counterflow wort chillers pipe the hot wort through pipes that are submerged into an ice bath. This process chills wort vert quickly and does not waste water while doing so. If you want to attempt a DIY version of a counterflow wort chiller, then you can follow this tutorial.
A plate chiller works similarly to a counterflow chiller, but instead pumps your boiling wort through a chilled set of plates that are welded together. Plate chillers channel hot wort in one direction while cold water is pumped in the other direction, thus extracting the radiant heat from the wort.
Items You’ll Need
- 3/8 in. O.D x 20 ft. Soft Copper Refrigeration Coil Tubing
- You can use stainless steel tubing here as well, but it is quite a bit more expensive.
- ~25ft of 14 AWG Solid Copper Wire
- I couldn’t find any of this at my local store, but I was able to find shielded wire, and I just stripped the plastic coating off of it before using.
- 3/8 in. OD Compression x 1/2 in. MIP Brass Adapter Fitting
- 1/2 in. FIP x 1/2 in. MIP, Brass Full Port Ball Valve
- 3/4 in. FHT x 1/2 in. FIP Brass Hose Adapter Fitting
- (1) 5/16 in. – 5/8 in. Stainless-Steel Hose Clamp
- These will usually come in a multi-pack, but you’ll only need one.
- 3/8 in. I.D. x 1/2 in. O.D. Clear Vinyl Tubing, approximately 6 feet.
- A full size paint can
- Plyers
- Wire cutters
- A pipe cutter (if you have a copper tube longer than ~20 ft)
The DIY Build Process
- Start by winding the copper tubing around the bottom of the paint tin, leaving at least 3’ sticking out and unwound. We’ll make this the water entrance and use it later.
- As you wind the tubing around the paint can, leave ½” of space between each time around. Fold this copper tubing very gently as it will definitely collapse on itself and making a kink in the tube if you try to make too sharp of a bend in it. If you want to be extra safe you can use a spring bender, although I was just really careful and did not use one.
- Continue winding around the paint can until your chiller is at the desired height or when you only have about 2 feet of tubing left. This will be where the water exits.
- Next, sit the coil on your work surface, the water entrance end on the bottom, and gently bend the exit end so it points upwards. Then bend the top 6 inches or so of it outwards so it bends down about 90 degrees.
- Gently bend the entrance coil (which should be sitting on your work surface) to vertical so it becomes flush with the coil. You can have it sit on the outside of the coil (easier) or carefully wind it up the inside (harder).
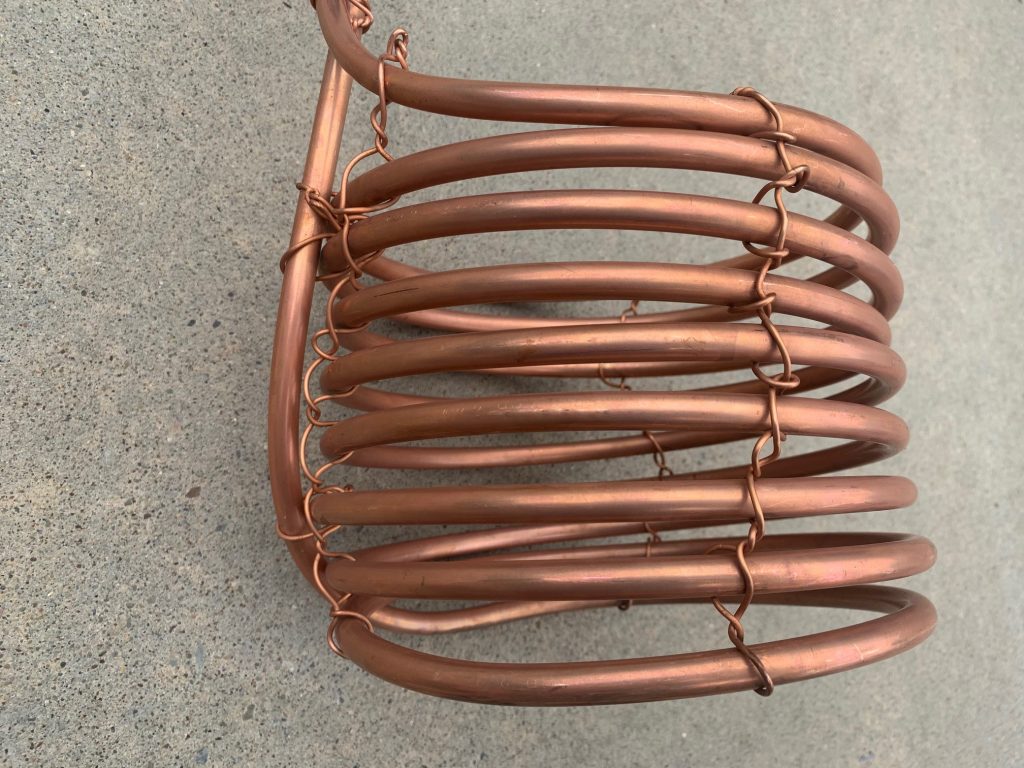
- Measure 2 lengths of copper wire that are each 2.5 times the height of the coil, e.g. for an 8” high coil, cut two 20” lengths of wire. Fold and weave the copper wire between each row of copper tubing, giving it a half twist in between each row. Repeat on the other side of the coil. This creates some structure and holds the coils together.
- Use some short lengths of wire to fasten the entrance and exit ends to the coil and to each other.
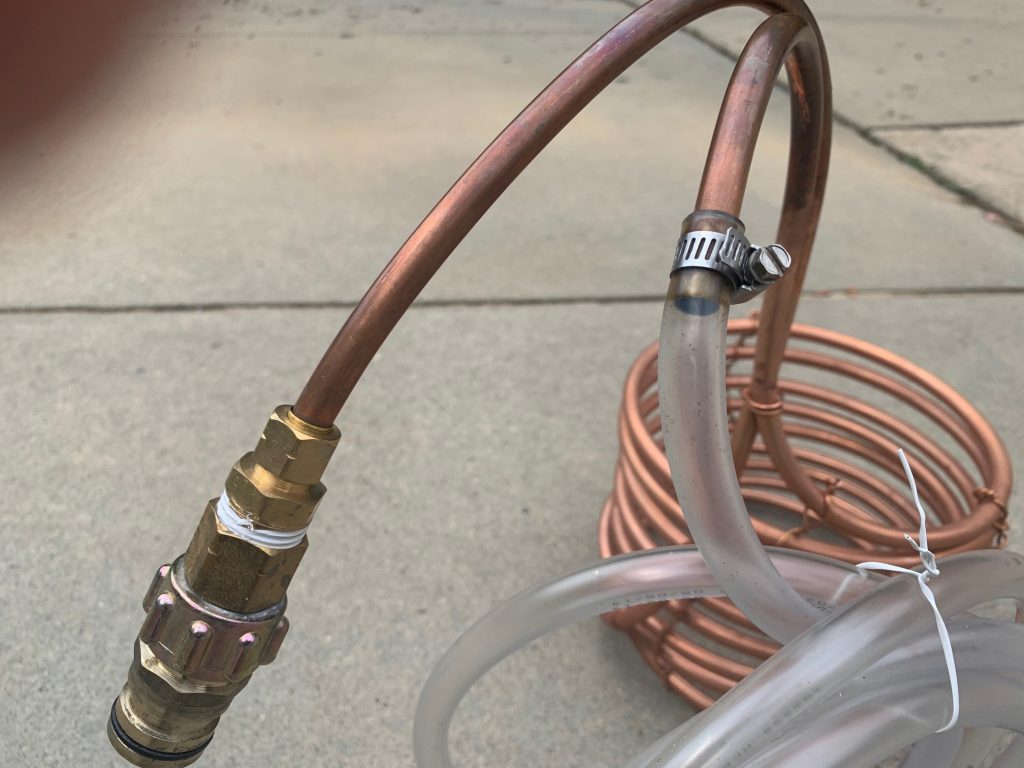
- At the exit end of the copper, slide a tube clamp over the end, then slide about 6 feet of vinyl tubing over it by about a half inch. Slide the tube clamp back over the joint and tighten with a screwdriver.
- Attach the compression fitting adapter to the entrance end of the copper tube and secure tightly. This process took me a while because I felt like I could never get it tight. I just really cranked on the wrench and voila – that did it.
- Attach the ball valve (not pictured in my gallery… I added it later) to the compression fitting, then the hose adapter fitting to that.
- TEST and BOIL IT. I cannot stress this step enough. I did not do this and ruined a whole batch of beer because it tasted like new copper metal. Boiling it will oxidize the copper and will get rid of any metallic taste that may be on the outside of the tubing. This process is also important to ensure that all your fittings are tight.
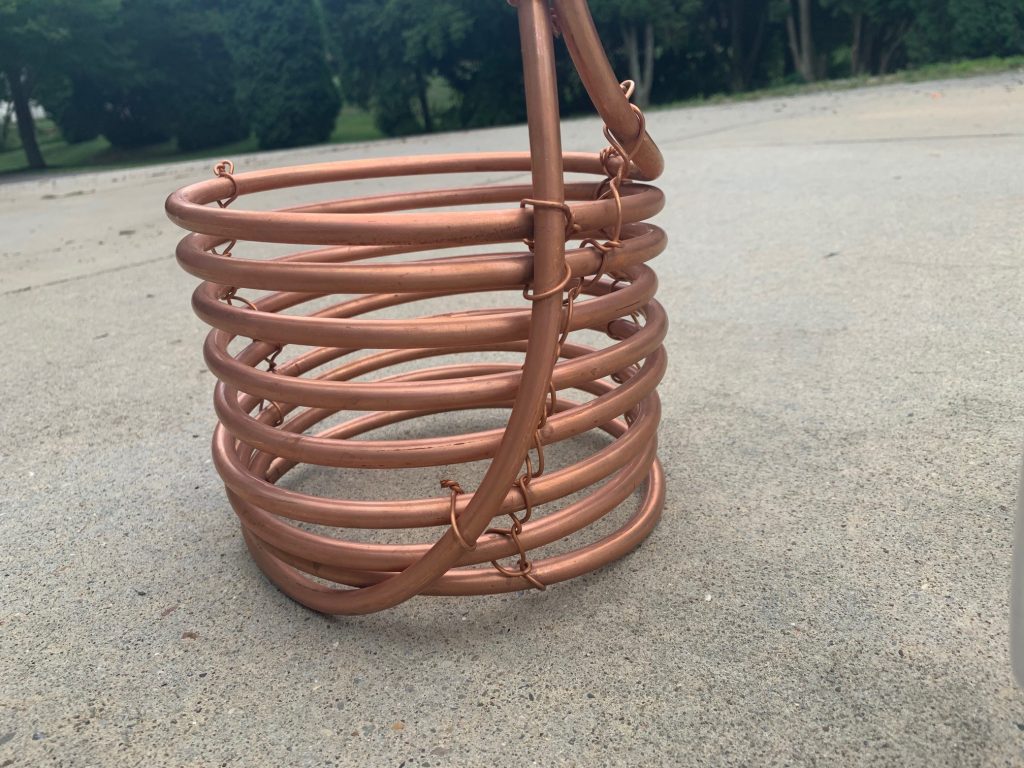
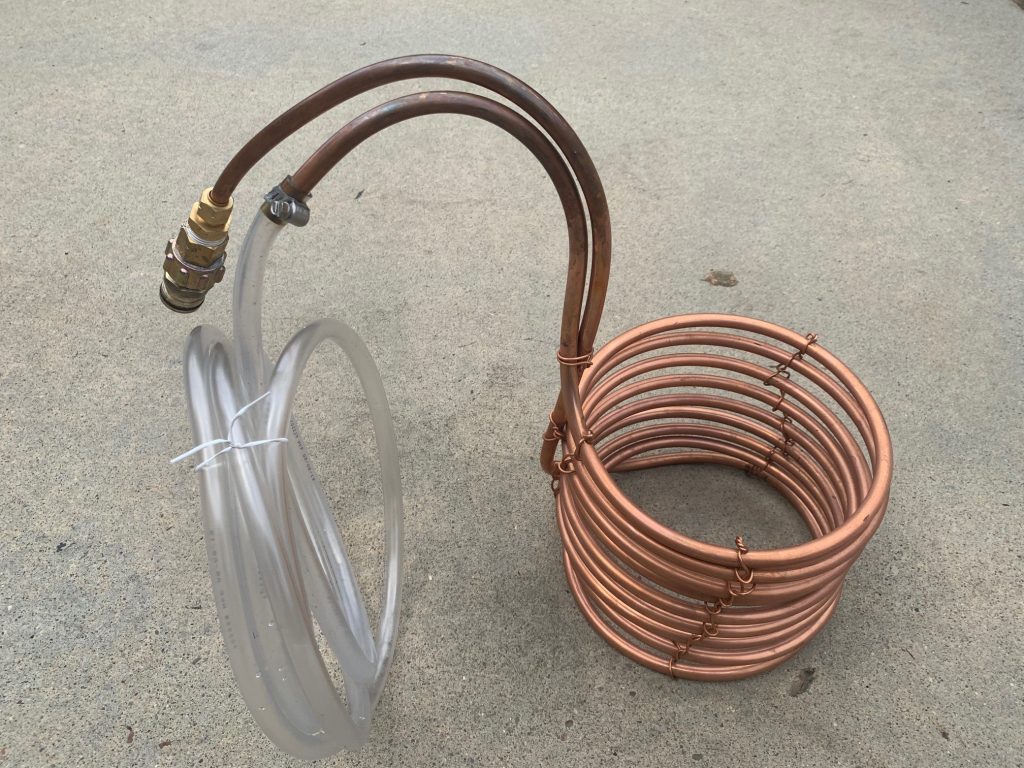
The Hose Adapter
The adapter I linked to above is the one to use if you plan on attaching it to a standard garden hose. Other adapters can be used if you are instead connecting it to your sink or other water dispensing device.
If you are like me and plan on using your garden hose, I have these quick connect adapters added to all my hose attachments (power washer, hose nozzle, immersion chiller, etc). These are one of those things that you didn’t know you absolutely needed until you had them. They make my life so much easier.
How to use Your Immersion Wort Chiller
- Have the wort chiller ready to go next to your boil kettle. With about 10-15 minutes to go in the boil, add the chiller. The boiling will sanitize the immersion chiller. At this point, I do not yet have it connected to my hose.
- Once your boil time is up, I connect my hose to the chiller and start the cool down process. I usually turn my hose on slightly so only a little water comes out at once. Maybe 1 gallon-a-minute or so. There is no science here, but if the water is blowing through the hose at top speed you are going to go through A LOT of water.
- The water running out of the chiller will be super hot at first and quickly cool to lukewarm. I usually collect the runoff into a couple Rubbermaid containers and use that water for equipment cleanup.
- Once your wort is down to your pitching temperature, you can pick it up out of your kettle and place it in the water you collected and give it a good cleaning with your hands. Don’t use anything abrasive like a scrub sponge or any soap. I just use my hands in the lukewarm water and all the crud from your wort usually falls right off.
- Place it on a shelf, waiting for its next use.
